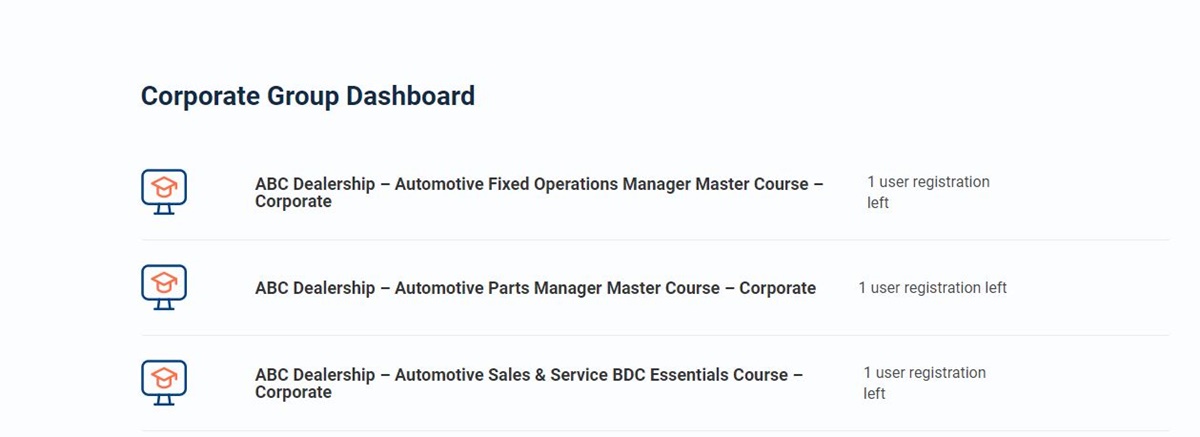
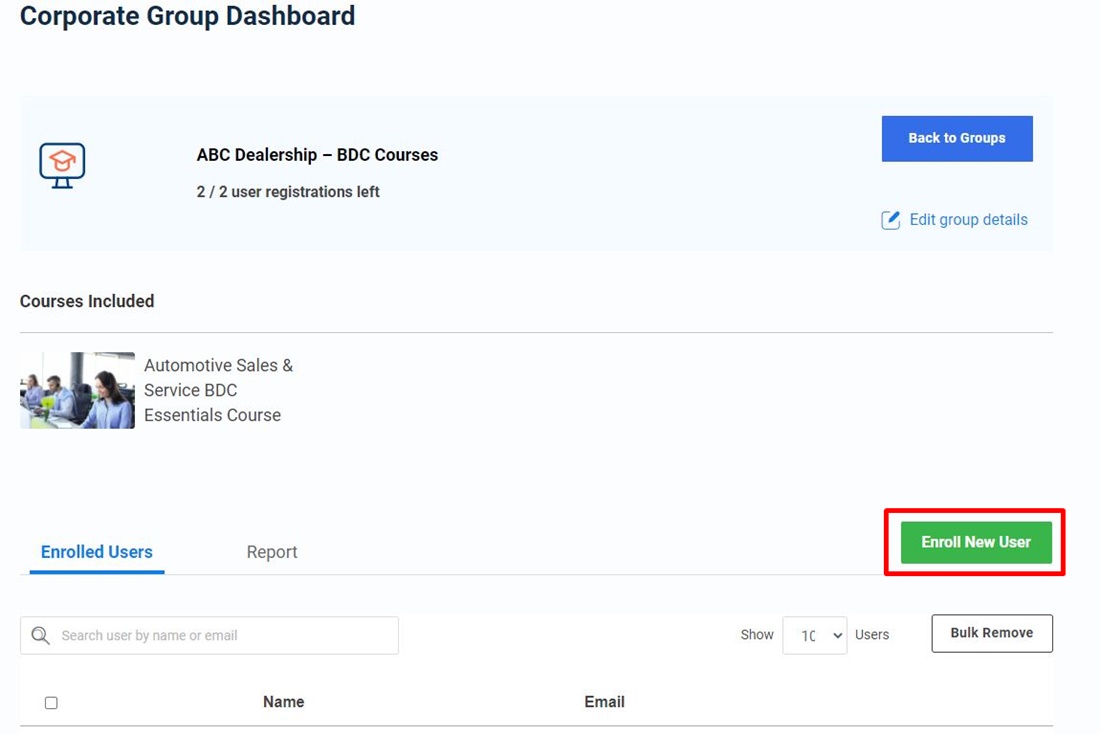
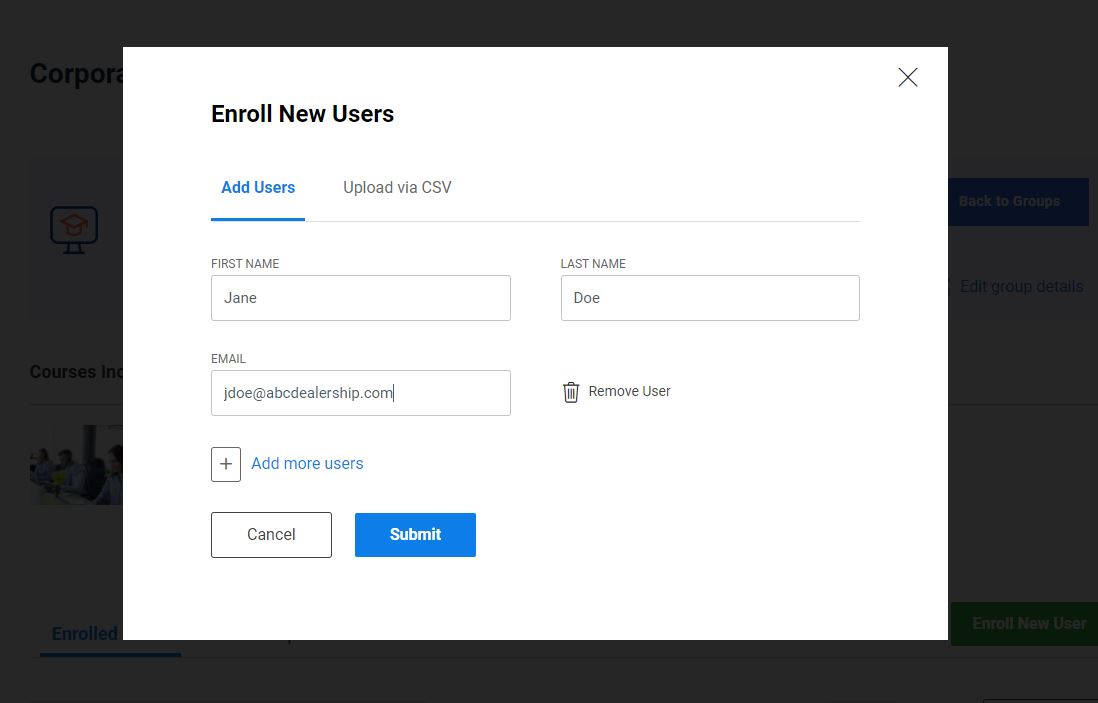
An email invitation is sent to each new user with a login ID and password when the group leader enrolls employees via the “Enter New User” button on the Corporate Group Dashboard course page.
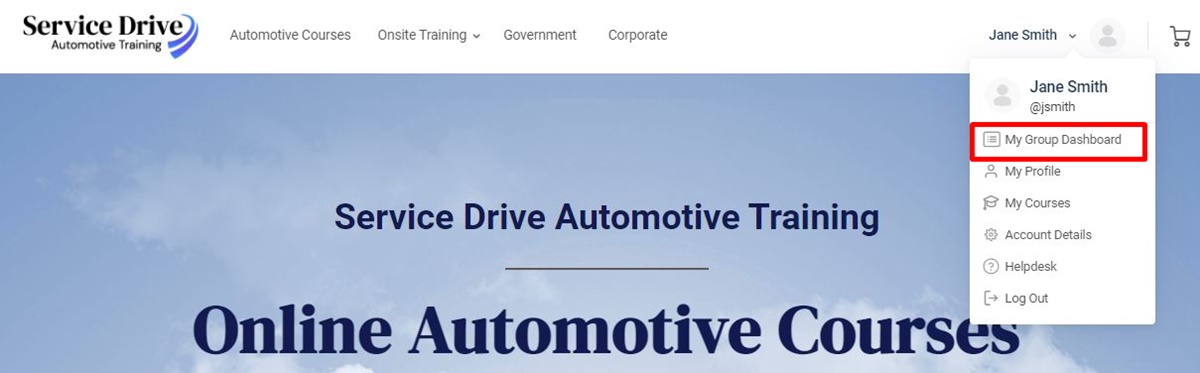
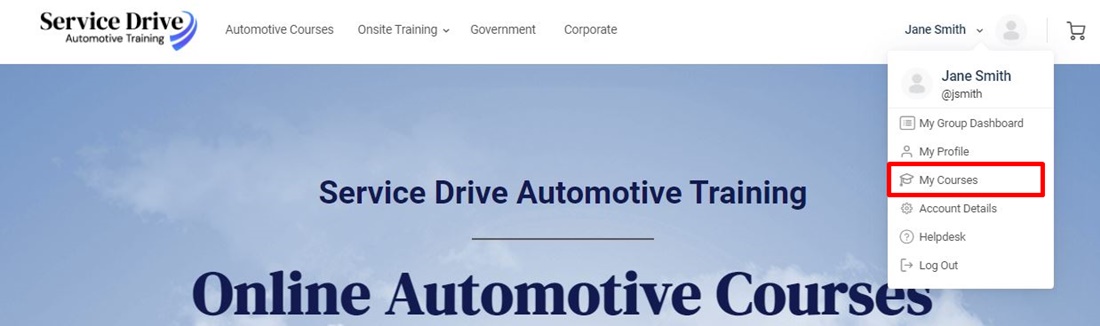
Existing users can access the course immediately from the “My Courses” drop-down tab located under their username on the menu bar.
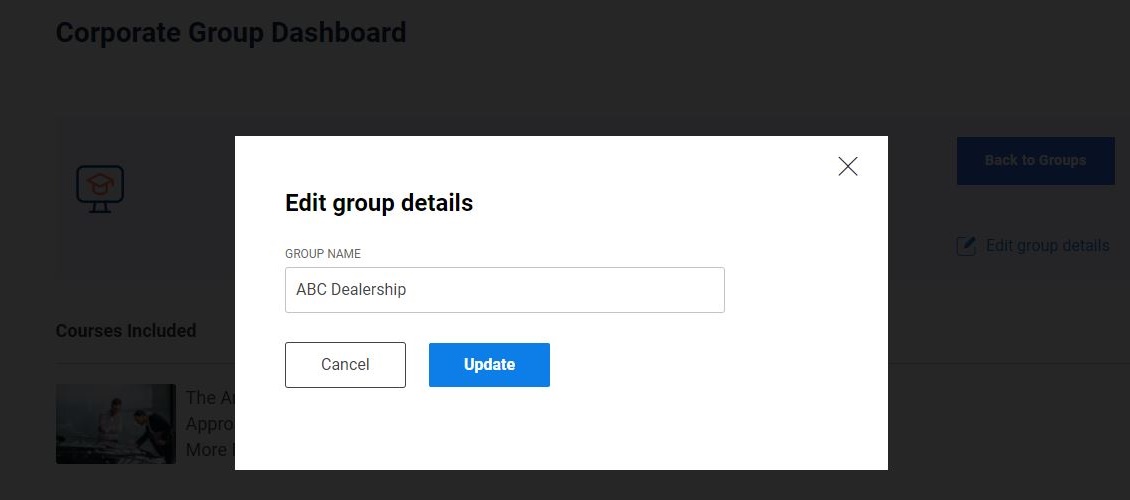
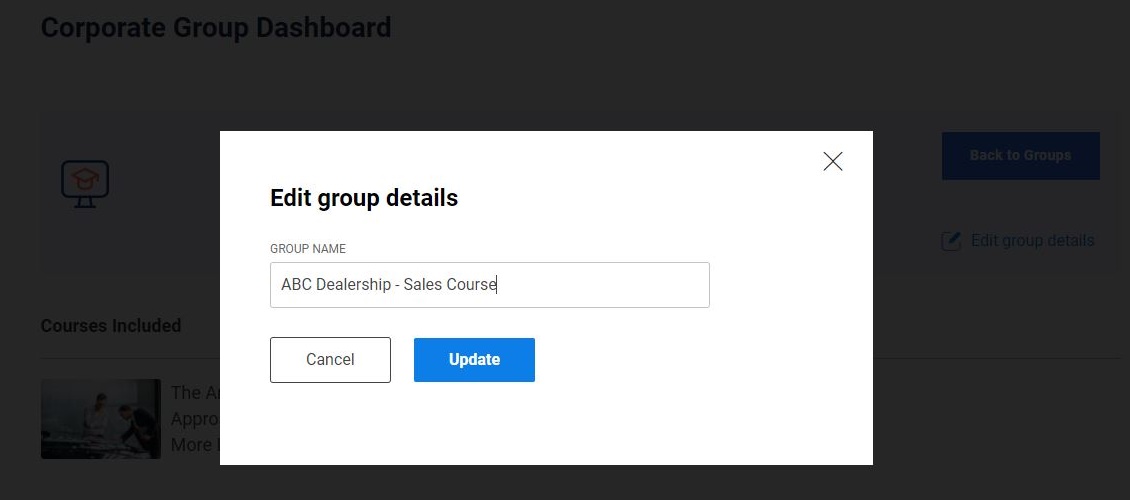
Changing The Title Of Each Group
You can customize the name of each group on your corporate group dashboard page. Personalizing the name can make navigating through each group on the dashboard easier.
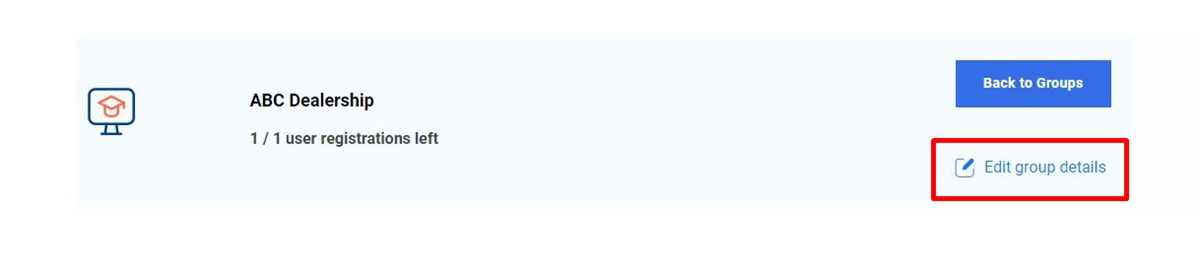
At the Corporate Group Dashboard main page, select the group you want to change the name.
Once you are on the group page, select the “Edit group details.”
A popup window opens called “Edit group details.” In here, you can change the name of this group.
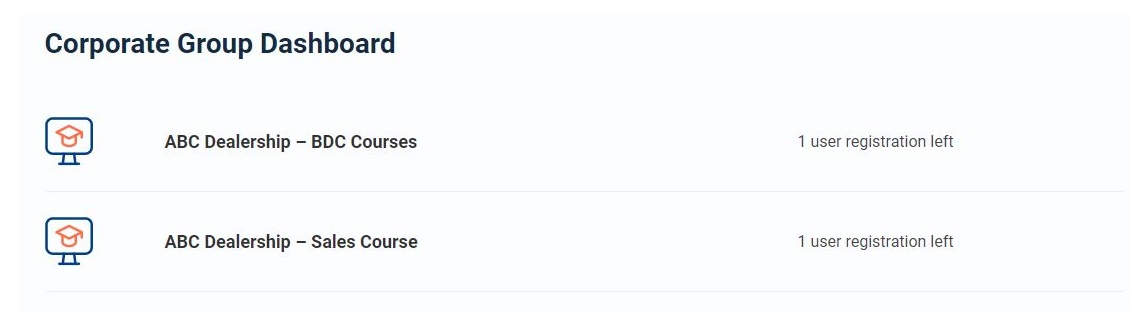
Now it’s easier to see which courses belong to each group.
Student Reporting & Course Progress
The Group Leader can see the course progress, quiz statistics, and certificates of its students.
At the “Corporate Group Dashboard,” go to the course page and select the “Reports” tab to see each user’s course progress, quiz statistics, and certificates.
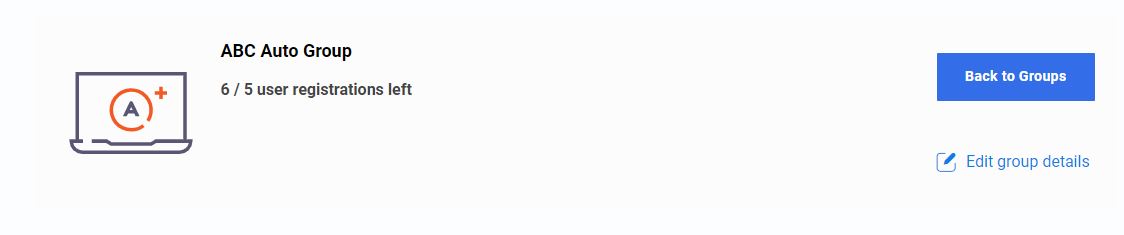
"Enter New User" Button Disappeared
The “Enter New User” button disappears when all the available seats for the course are filled.
Scroll down the page to purchase more course seats.
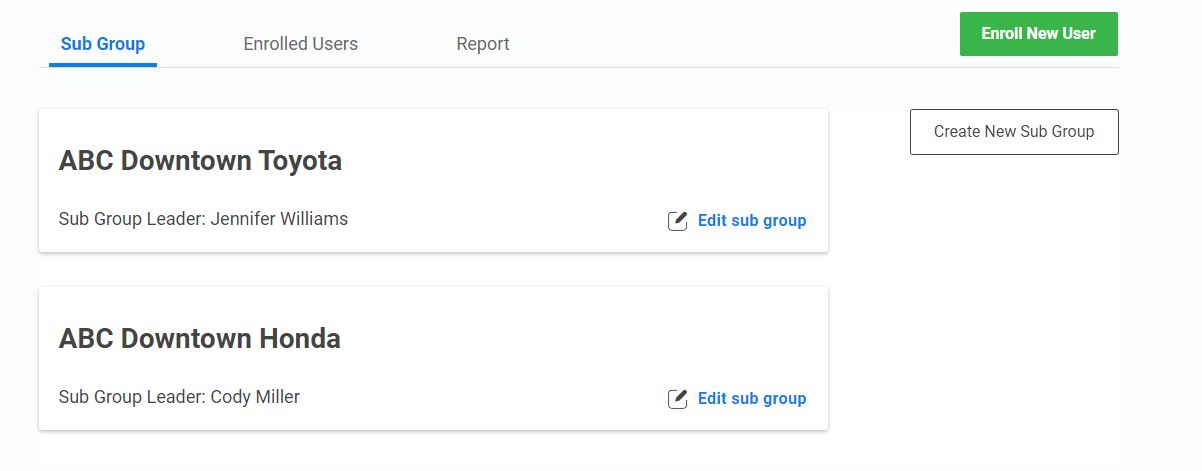
Sub Group
Creating Sub Groups
Sub Groups is ideal for automotive groups with multiple stores. Using sub groups enables head office to purchase courses in bulk within the parent group, then sub-divide the course and quantities to individual stores.
You can create new sub-groups from the group’s dashboard under the Sub-Group tab by clicking on the Create New Sub-Group button.
Creating Sub Groups
Sub Groups is ideal for automotive groups to purchase courses in bulk, then sub-divide the course to individual stores.
You can create new sub-groups from the group’s dashboard under the Sub-Group tab by clicking on the Create New Sub-Group button.
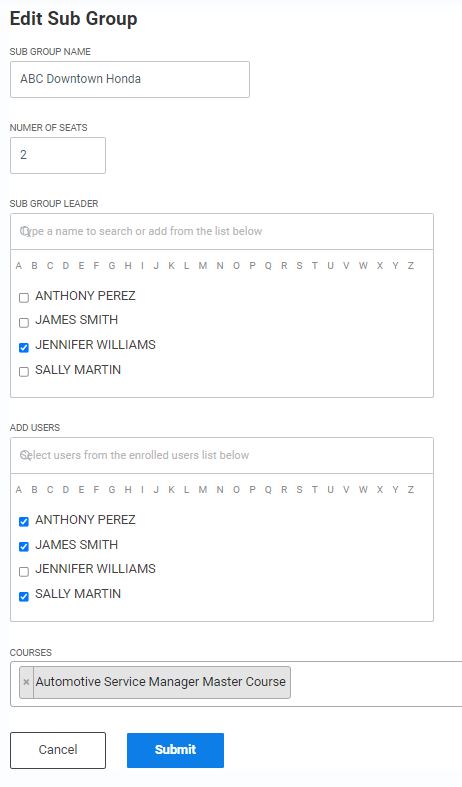
Sub Group Name:
Pick a name for the new sub-group.
Number of Seats (Students):
Select the number of seats to be allocated to the new sub-group. The seats will reduce the amount remaining from the parent group.
Sub Group Leader:
Choose a sub-group leader from the list of enrolled users in the parent group.
Note: If the person you want to add as your sub-group leader was not registered to a course previously, please complete the customer support form at the bottom of this page. Our customer support team will gladly make the changes for you within 24 hours.
Add Users:
Select the users to be transferred from the parent group to the new sub-group.
Note: These users will no longer be a member of the parent group, and they will only have to the sub-group.
Courses:
List of courses allocated to the sub-group. The users enrolled in the sub-group will have access to these courses.
Purchasing More Course Seats
Group leaders can purchase more course seats on the “Corporate” page and at the bottom of the “Corporate Group Dashboard” page.
Corporate groups can mix and match courses in the “Corporate Courses” category to receive up to 30% off the purchase price.
Personalizing Email Templates
Email templates are generated on the system’s server and cannot be personalized.
Removing Users From Courses
A “Remove” button is available if a group leader wants to unregister a student from a course or Sub-Group.
Note: Removing a student will not automatically credit a user’s seat back to your store.
Credit or refunds are allowed if the user has not started their course. For seat credits or refunds, please contact our customer support team. Group leaders will notify by email within 24 hours.
Adding/Removing Group Leaders
Once a leader is selected for a parent group, you will not have the ability to add or remove group leaders. However, our customer support team will gladly make the changes for you. Please complete the customer support form at the bottom of this page and we will make the changes within 24 hours.
Group Refund
Full group refunds are provided if users have not accessed the courses. Please complete the customer support form at the bottom of this page.
Copyright & Legal
Any written, visual, or downloadable materials on servicedrive.ca are automatically copyrighted, and we will pursue any violator of that copyright whether or not a notice is placed on the course material.
Please refer to the Terms of Service page for further details or contact our help desk at support@servicedrive.ca.
Customer Support
Need help? We're here for you.
Find solutions to common problems, or get help from a customer support representative.
This website uses cookies to improve your experience. We'll assume you're ok with this, but you can opt-out if you wish.
This website uses cookies to improve your experience while you navigate through the website. Out of these, the cookies that are categorized as necessary are stored on your browser as they are essential for the working of basic functionalities of the website. We also use third-party cookies that help us analyze and understand how you use this website. These cookies will be stored in your browser only with your consent. You also have the option to opt-out of these cookies. But opting out of some of these cookies may affect your browsing experience.
Necessary cookies are absolutely essential for the website to function properly. These cookies ensure basic functionalities and security features of the website, anonymously.
Cookie
Duration
Description
cookielawinfo-checkbox-analytics
11 months
This cookie is set by GDPR Cookie Consent plugin. The cookie is used to store the user consent for the cookies in the category "Analytics".
cookielawinfo-checkbox-functional
11 months
The cookie is set by GDPR cookie consent to record the user consent for the cookies in the category "Functional".
cookielawinfo-checkbox-necessary
11 months
This cookie is set by GDPR Cookie Consent plugin. The cookies is used to store the user consent for the cookies in the category "Necessary".
cookielawinfo-checkbox-others
11 months
This cookie is set by GDPR Cookie Consent plugin. The cookie is used to store the user consent for the cookies in the category "Other.
cookielawinfo-checkbox-performance
11 months
This cookie is set by GDPR Cookie Consent plugin. The cookie is used to store the user consent for the cookies in the category "Performance".
viewed_cookie_policy
11 months
The cookie is set by the GDPR Cookie Consent plugin and is used to store whether or not user has consented to the use of cookies. It does not store any personal data.
Report
There was a problem reporting this post.
Block Member?
Please confirm you want to block this member.
You will no longer be able to:
See blocked member's posts
Mention this member in posts
Invite this member to groups
Message this member
Add this member as a connection
Please note:
This action will also remove this member from your connections and send a report to the site admin.
Please allow a few minutes for this process to complete.